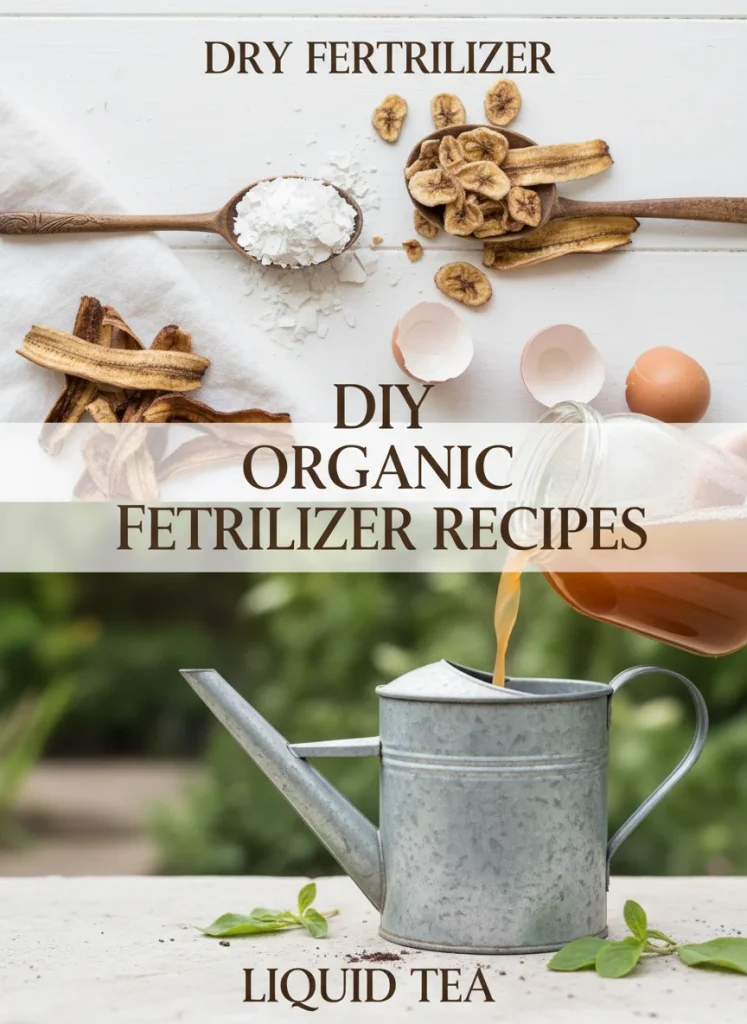
DIY Organic Fertilizer: How to Turn Kitchen Scraps into Liquid Gold
Quick Summary & Direct Answer
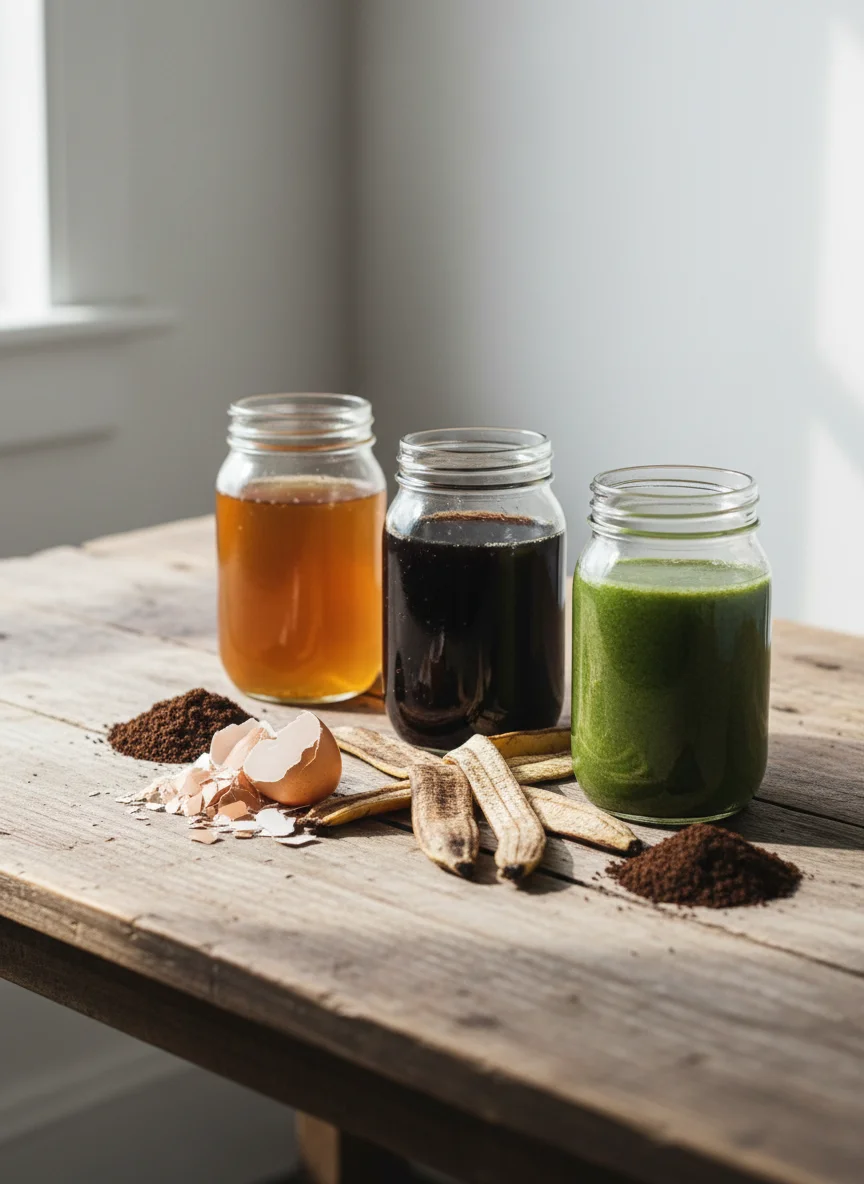
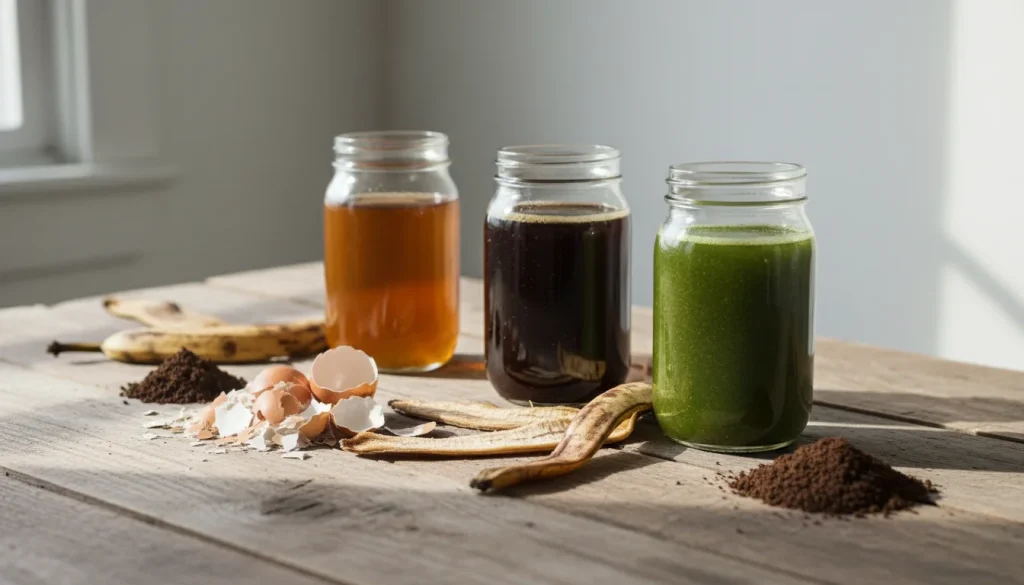
You can manufacture organic fertilizer at home using two primary methods: Dry Slow-Release Powders and Fast-Acting Liquid Teas. For slow-release nutrients, dehydrate and grind banana peels (potassium) and eggshells (calcium) into a fine dust to mix into the soil. For an immediate nutrient boost, steep compost, weeds, or vegetable scraps in rainwater for 3 to 7 days to create a concentrated liquid, then dilute it 1:10 with water before applying to plant roots.
Stop throwing your garden’s potential into the trash bin; the secret to lush foliage is likely sitting in your kitchen compost pail right now.
The Science of Scraps: Understanding N-P-K
Before dumping your morning coffee grounds onto your prize-winning roses, it is vital to understand the basic chemistry of plant growth. Most commercial fertilizers focus on three primary macronutrients: Nitrogen (N), Phosphorus (P), and Potassium (K). When you make your own organic fertilizer, you are essentially sourcing these elements from biological waste rather than synthetic chemicals.
- Nitrogen (N): Promotes leafy, green growth. Found heavily in coffee grounds and fresh grass clippings.
- Phosphorus (P): Crucial for root development and seed formation. Found in bone meal and fruit skins.
- Potassium (K): Essential for flowering, fruiting, and overall plant immunity. Banana peels are the superstar source here.
By processing your waste correctly, you make these nutrients bioavailable to your plants. Simply throwing a whole banana peel on the soil will attract pests and take months to decompose. The methods below accelerate this process significantly.
Method 1: The Dry Powder Technique (Slow Release)
The dry powder method is best for soil preparation or mid-season top dressing. Because the organic matter is ground into fine particles, surface area is increased, allowing soil microbes to break it down faster than whole scraps, but slower than liquid feeds. This provides a steady drip-feed of nutrients.
1. Calcium-Rich Eggshell Powder
Calcium is critical for building strong cell walls in plants. A deficiency often leads to blossom end rot in tomatoes and peppers. Eggshells are approximately 95% calcium carbonate, making them the perfect supplement.
The Process:
- Rinse: thoroughly wash the shells to remove egg whites, which can attract rodents.
- Sterilize: Bake the shells in an oven at 200°F (95°C) for 20 minutes to dry them out completely and kill potential salmonella.
- Pulverize: This is the most important step. Crushed shells take years to break down. Use a coffee grinder or high-speed blender to turn the shells into a fine, flour-like dust.
- Application: Mix 1-2 tablespoons of powder into the planting hole or scratch it into the soil surface around established plants.
2. Potassium-Packed Banana Powder
Potassium helps plants move water and nutrients between cells. It is vital for the flowering phase.
The Process:
- Chop: Cut peels into small 1-inch squares to speed up drying.
- Dehydrate: Lay them on a baking sheet in the sun for several days until crisp, or use an oven on the lowest setting (or a dehydrator). They must be brittle, not leathery.
- Grind: Blitz them in a blender until you have a dark, fragrant powder.
- Application: Sprinkle a tablespoon around the base of flowering plants and water it in.
Method 2: Liquid Fertilizer Teas (Fast Acting)
Liquid fertilizers are the “energy drinks” of the garden world. Because the nutrients are already dissolved in water, plant roots can absorb them almost immediately. This is excellent for correcting nutrient deficiencies quickly or giving seedlings a boost.
1. The Classic Compost Tea
If you already have a compost pile, this is the most balanced fertilizer you can make. It introduces beneficial bacteria and fungi to your soil.
Instructions:
- Bag It: Put two shovelfuls of finished compost into an old pillowcase or burlap sack (like a giant tea bag).
- Soak It: Submerge the bag in a 5-gallon bucket of water. (See the note below on water quality).
- Wait: Let it steep for 24 to 48 hours. Stir it occasionally to introduce oxygen.
- Dilute: The resulting liquid should look like weak iced tea. Dilute it at a ratio of 1 part tea to 10 parts water.
2. Weed Tea (The JADAM Method)
Weeds are often nutrient accumulators, pulling minerals from deep in the subsoil. By fermenting them, you return those nutrients to your garden. This is high in nitrogen and excellent for leafy greens.
Instructions:
- Harvest: Pull fresh weeds (ensure they have not gone to seed yet) or use fresh grass clippings.
- Submerge: Pack a bucket 2/3 full of plant matter and fill to the top with rainwater.
- Cover: Place a loose lid or cloth over the top to keep mosquitoes out but let air escape.
- Ferment: Let it sit for 1 to 3 weeks. Warning: This method creates an anaerobic fermentation which will smell very bad (like a barnyard). This is normal.
- Dilute: Strain the solids (compost them) and dilute the liquid 1:10 or 1:20. It is potent stuff.
3. Kitchen Scrap “Soup.”
If you don’t have a compost pile, you can steep fresh scraps directly.
Instructions:
- Collect vegetable ends, fruit peels, and leafy greens. Avoid meat, dairy, oils, or cooked foods, as these breed harmful pathogens.
- Soak in a bucket of water for 3 days.
- Strain and dilute. This provides a broad spectrum of vitamins and micronutrients.
Pin This for Later!
Save this blueprint to your favorite Pinterest board so you never lose this strategy.
3 Critical Rules for Success
Making fertilizer is easy, but applying it incorrectly can harm your garden. Follow these three golden rules to ensure safety and efficacy.
1. The Water Quality Rule
Most municipal tap water contains chlorine or chloramine, specifically designed to kill bacteria. If you use fresh tap water to make compost tea, you might kill the beneficial microbes you are trying to cultivate.
The Fix: Use rainwater whenever possible. If you must use tap water, fill your bucket and let it sit uncovered in the sun for 24 hours. This allows the chlorine to evaporate (off-gas) before you add your organic matter.
2. The Dilution Rule
A common mistake beginners make is thinking “more is better.” Homemade liquid fertilizers, especially weed teas, can be highly acidic or nutrient-dense. Pouring them directly on plants can cause “fertilizer burn,” turning leaves yellow and crisp.
The Fix: Always dilute. A standard safety ratio is 1:10 (1 part fertilizer to 10 parts water). For delicate seedlings, increase this to 1:20. The color of your final mix should look like weak tea, not dark coffee.
3. The Balance Rule
While coffee grounds are great, using only coffee grounds adds too much nitrogen and acidity, potentially locking out other nutrients. While eggshells are great, they don’t provide nitrogen.
The Fix: Rotate your fertilizers. Use banana peel powder one month, and compost tea the next. Diversity in your inputs leads to diversity in your soil health.