
A Complete Guide to Growing Spinach Indoors
Fresh Greens Regardless of the Season
We often assume that a productive vegetable garden requires a massive backyard and hours of sweating under the summer sun. That is simply not true. Spinach is one of the most forgiving and rewarding crops we can grow. It does not require acres of land. It does not require heavy machinery. It only asks for a little bit of attention and the right environment.
Here is the reality of grocery store spinach. By the time that plastic clam-shell container reaches your refrigerator, the leaves have traveled hundreds of miles. They have lost flavor. They have lost nutrients. Worst of all, they often turn into a slimy mess within three days. We can change that dynamic entirely.
Growing spinach indoors allows us to harvest exactly what we need for a single meal. The leaves stay crisp. The flavor is remarkably sweet compared to the store-bought variety. However, indoor gardening does present a unique set of challenges. We cannot just throw seeds in a cup and hope for the best. We need to replicate nature inside our homes.
This guide will walk us through the specific mechanics of growing spinach indoors. We will look at soil structure, light requirements, and the delicate balance of watering. Follow these steps to build a sustainable source of fresh greens.
1. The Foundation: Container and Soil Selection
Everything starts with the root system. If the roots are unhappy, the leaves will never thrive. We must select the right home for our plants before we even think about opening a seed packet.
Selecting the Right Container
Spinach has a taproot that likes to stretch out. We cannot crowd this plant into a shallow saucer. We need depth.
For growing baby greens, which are harvested young and tender, we need a container that is at least 6 inches deep. This allows enough room for the roots to anchor themselves and access moisture. If we want to grow full-sized, mature spinach plants with large crinkled leaves, we need to upgrade to a pot that is 10 to 12 inches deep.
The material of the pot matters less than the drainage. We must ensure there are drainage holes at the bottom. This is non-negotiable. Without drainage, water pools at the bottom of the pot. This causes the roots to sit in stagnant water. They will rot. The plant will die. If you find a beautiful decorative pot that lacks holes, drill them yourself or use it as a cachepot to hold a plastic nursery pot inside.
The Soil Mix
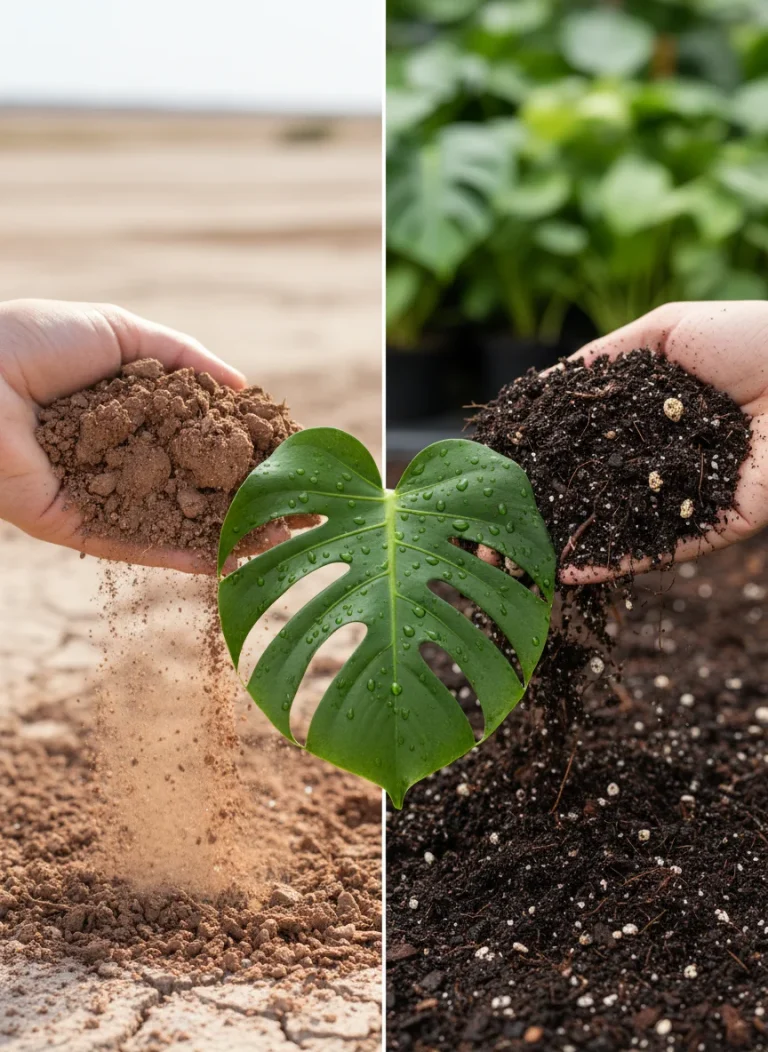
Boring, but essential. This is the most critical variable for indoor success. Do not use garden soil. Digging up dirt from the backyard is a recipe for disaster in a container. Garden soil is heavy. It contains clay and rocks. When we put it in a pot, it compacts into a dense brick that suffocates roots. It also likely contains bugs and weed seeds.
We need a high-quality potting mix. Look for a mix that contains perlite or vermiculite. These are the small white specks you see in soil bags. They help keep the soil fluffy and aerated. This allows water to flow through the pot while retaining enough moisture for the roots to drink. We suggest mixing in some compost or organic matter. This provides a slow-release source of nutrients that will feed the spinach over time.
2. The Art of Planting Seeds
Spinach seeds are relatively large compared to other greens. This makes them easy to handle. We do not need to worry about microscopic dust-like seeds. However, depth and spacing are vital for strong germination.
Sowing Strategy
Start by pre-moistening the soil. Put the soil in a bucket and mix it with water until it feels like a wrung-out sponge. It should be damp but not dripping. Fill your container with this pre-moistened mix.
Sow the seeds about 1/4-inch deep. We do not want to bury them too deep, or they will run out of energy before they break the surface. We also do not want them sitting on top, or they will dry out.
Spacing depends on your goals. For baby spinach, space seeds about 1 to 2 inches apart. We can grow them densely because we will harvest them while they are small. For larger plants, give them more room to breathe.
The Greenhouse Effect
Cover the seeds lightly with soil and mist the surface with a spray bottle. Here is a professional trick to speed up germination. Cover the top of the container with plastic wrap. This creates a mini-greenhouse. It traps humidity and warmth. This signals to the seed that it is safe to wake up.
We must check under the plastic daily. As soon as we see the first green sprout loop out of the soil, remove the plastic immediately. Leaving it on too long can lead to fungal issues and mold.
3. Light Requirements: The Energy Source
This is where most indoor gardeners fail. Our eyes adapt to low light very well. We walk into a living room and think it is bright. To a plant, that living room is a dark cave. Plants need light to manufacture energy. Period.
Window vs. Grow Light
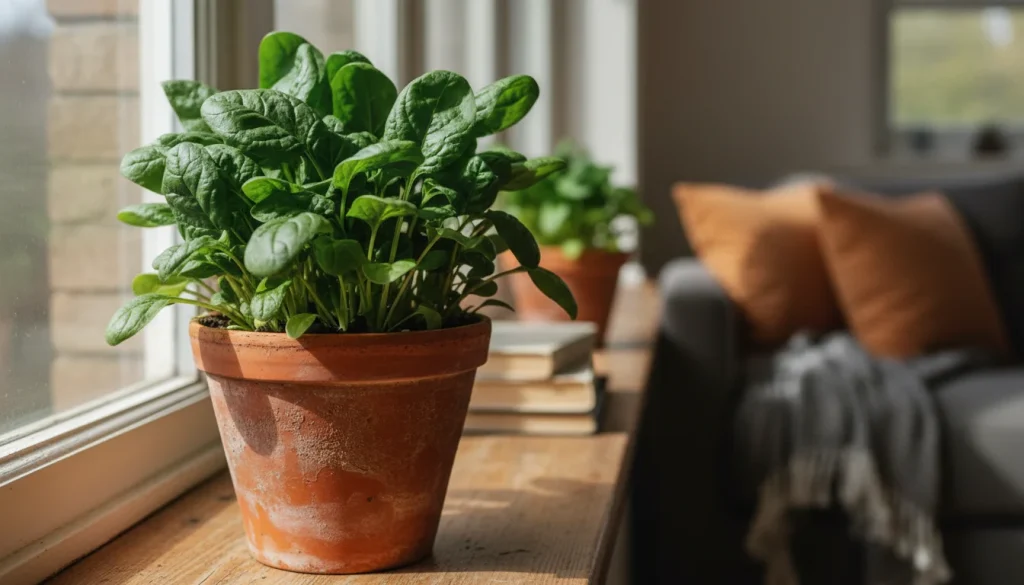
Spinach needs at least 4 to 6 hours of bright, direct sunlight daily. A south-facing window is usually the best option in the Northern Hemisphere. However, winter sunlight is weak. Even a sunny window might not provide enough intensity for vigorous growth.
If your spinach looks tall, pale, and floppy, it is stretching for light. This is called “etiolation.” The plant is desperate. To fix this, we highly recommend using a grow light. We do not need expensive professional equipment. A simple full-spectrum LED bulb or a fluorescent shop light works wonders.
If using artificial lights, we need to run them for about 14 hours a day. Place the light close to the plants, roughly 4 to 6 inches above the leaves. Move the light up as the plants grow. This ensures they stay stocky and strong rather than spindly and weak.
4. Temperature Control and Bolting
Spinach is a cool-weather crop. It loves the spring and the autumn. It hates the heat of summer. When spinach gets too hot, it panics. It thinks it is going to die, so it stops growing leaves and sends up a tall flower stalk to produce seeds. This is called “bolting.”
Once spinach bolts, the flavor changes instantly. The leaves become bitter and tough. The plant is no longer edible.
To prevent this, we must manage the temperature. Keep the environment between 60°F and 75°F. This is usually typical room temperature, which makes spinach a great roommate. Avoid placing the pot directly next to a heating vent, a radiator, or a fireplace. The blasts of hot air will trigger bolting. If your home gets very warm, consider moving the plant to a cooler spot or a basement with grow lights.
5. Watering and Feeding Protocols
Water management in containers is different than in the ground. In the ground, roots can travel deep to find water. In a pot, they are trapped. They rely entirely on us.
The Moisture Balance
This is often overlooked, but the goal is consistent moisture. We want the soil to feel like a damp sponge at all times. We do not want it soggy. We do not want it bone dry. If the soil dries out completely, the spinach will wilt. If it stays wet too long, the roots will rot.
Check the pots daily. Small containers dry out much faster than large ones. Stick your finger into the soil up to the first knuckle. If it feels dry, it is time to water. Water in the morning. This allows any water droplets on the leaves to evaporate during the day. Wet leaves at night encourage disease.
Nutrition
Potting mix usually runs out of nutrients after a month or so. Spinach is a leafy green, which means it craves nitrogen. Nitrogen is the fuel for green growth. We need to replenish this food source.
Feed the plants with a liquid fertilizer every 2 to 3 weeks. Fish emulsion is a fantastic organic option. It smells a bit strong, but plants love it. Alternatively, we can mix a slow-release granular fertilizer into the soil at the time of planting. This will provide a steady drip-feed of nutrients over several months.
6. Thinning and Harvesting Strategies
We have watered. We have provided light. Now we have a pot full of seedlings. This brings us to the hardest part of gardening for beginners.
The Necessity of Thinning
Let’s be honest. It hurts to cut down healthy seedlings. We want to save them all. But if we leave them crowded, they will compete for resources. None of them will reach their full potential. They will all remain small and stunted.
When the seedlings have developed a few “true” leaves (the leaves that look like spinach, not the first round leaves), we must thin them. Use a small pair of scissors. Snip off the weaker looking plants at the soil line. Do not pull them out, as this can disturb the roots of the neighbors.
Leave about 3 to 4 inches of space between plants if growing for baby leaves. Leave 6 to 8 inches if you want large, mature plants. The good news is that the seedlings you snip off are edible. They are microgreens. Eat them.
Harvesting for Continuous Growth
We do not harvest the entire plant at once. If we cut the whole thing down, the show is over. We use the “cut and come again” method.
Identify the outer leaves. These are the oldest and largest leaves. Use scissors or your fingers to snap the stem near the base. Harvest only what you need for your meal. Leave the small leaves in the center alone. This center point is the growth crown. As long as the crown is intact, the plant will continue to push out new leaves from the middle.
By harvesting the outer leaves regularly, we encourage the plant to keep producing. This method allows a single pot of spinach to provide food for weeks or even months.
Final Thoughts
Growing spinach indoors is a practical way to improve our diet and connect with nature. It requires us to pay attention to the basic needs of life: water, light, air, and nutrition. Once we master these variables, we gain the freedom to harvest fresh, chemical-free greens whenever we desire. The result is better flavor and higher nutrition. Start with good soil. Watch the light. Keep it cool. The harvest will follow.
Read More
A Masterclass in Growing and Using Aloe Vera
The One Vegetable Every Gardener Should Grow (A Complete Guide)