How to Grow Basil Indoors on a Windowsill (Even in a North-Facing Room)
Disclosure: This article contains affiliate links. As an Amazon Associate we earn from qualifying purchases at no extra cost to you. We only recommend products we would use ourselves.
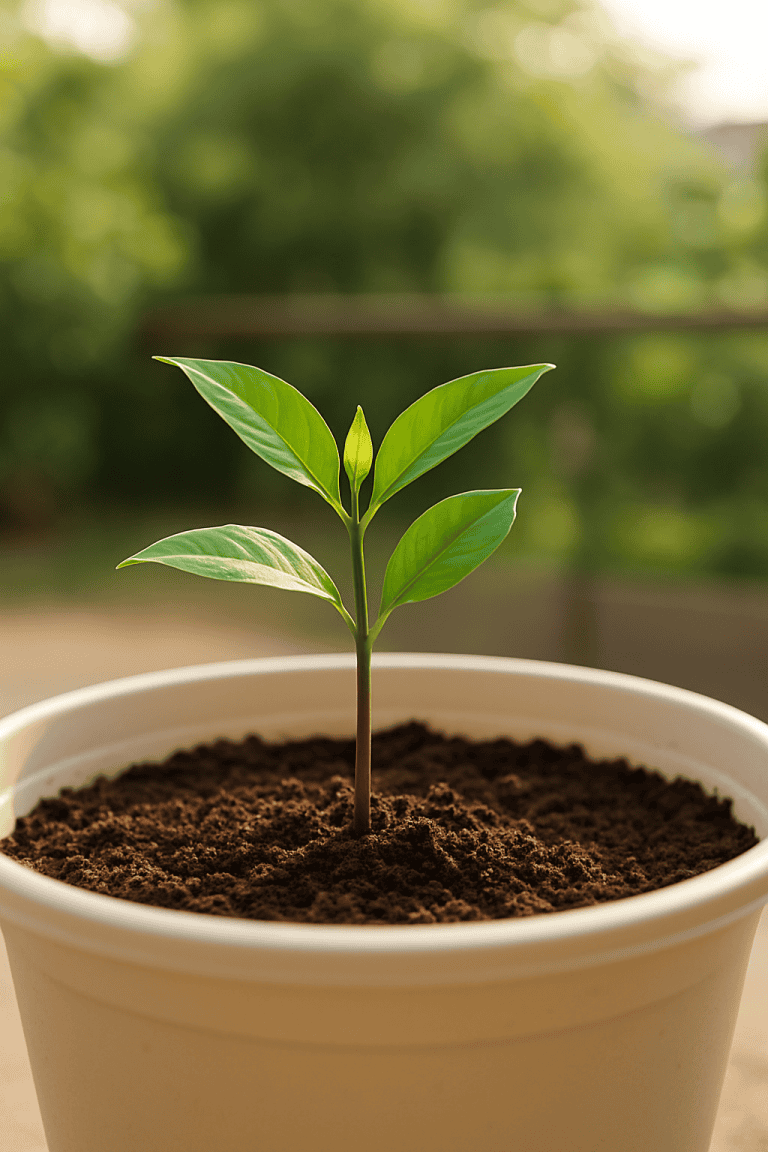
Many of us have been there: you buy a beautiful, bushy basil plant from the supermarket, full of promise and aromatic dreams. You bring it home, place it lovingly on your windowsill, and within a week or two, it’s a sad, leggy, yellowing shadow of its former self. You might feel a pang of embarrassment, thinking you simply lack a “green thumb,” especially if your only available windowsill faces north, seeming to defy all conventional gardening wisdom. I understand that feeling perfectly, but I am here to tell you that growing basil indoors on a windowsill is absolutely achievable, even in a north-facing room.
The truth is, most general guides for growing herbs assume you have an abundance of natural sunlight, often picturing a bright, south-facing window. They suggest “6-8 hours of direct sun” and then leave you to wonder how that’s possible in your less-than-ideal apartment. This article will not only hold your hand through the entire process of growing this fragrant herb indoors but will specifically tackle that north-facing window challenge, turning your perceived limitation into a manageable detail. We will transform your basil-killing past into a basil-harvesting future, ensuring you always have fresh leaves for your pesto, pasta, and pizzas.
Here is a quick overview of the essential steps we will cover to successfully grow basil indoors on a windowsill:
1. Assess Your Light: Understand basil’s light requirements and how to compensate for lower light levels, especially in north-facing windows.
2. Choose the Right Home: Select a pot with proper drainage and the ideal well-draining soil mix.
3. Master Watering: Learn the art of keeping your basil consistently moist without making it soggy.
4. Optimize Environment: Maintain suitable temperature and humidity levels for happy basil.
5. Harvest Smart: Discover how strategic harvesting is actually pruning, encouraging a bushy, productive plant.
6. Propagate New Plants: Get a bonus guide on how to grow new basil from supermarket cuttings.
Let us get started on your journey to a flourishing windowsill basil patch, no matter which direction your window faces.
The Light Conundrum: Making Basil Thrive Even in a North-Facing Room
Light stands as the single most critical factor for successfully growing basil indoors. Basil truly loves sunlight, typically thriving with at least six to eight hours of direct sun exposure daily. For outdoor plants or those in bright, south-facing windows during summer, this amount is often easily met. However, indoor windowsill environments, especially during shorter winter days or with less-than-ideal window orientations, rarely provide that much intensity or duration.
The distinction between a south-facing and a north-facing windowsill is profound, and understanding it is key to your success. A south-facing window typically receives the most intense, direct sunlight for the longest duration throughout the day, particularly during winter. An east-facing window offers gentle morning sun, while a west-facing window provides strong, hot afternoon sun. A north-facing window, on the other hand, receives indirect, ambient light, which is consistent but significantly less intense and provides almost no direct sun. This difference does not mean you cannot grow basil, but it definitely means you need to adjust your approach.
To help visualize the difference, consider this comparison:
| Feature | South-Facing Windowsill | North-Facing Windowsill |
|---|---|---|
| Light Quality | Bright, direct sun for 6+ hours; high intensity. | Indirect, consistent, but low-intensity light; no direct sun. |
| Seasonality | Excellent in all seasons, though summer might require some shade. | Adequate in summer, very insufficient in winter without intervention. |
| Basil Growth | Lush, compact, rapid growth. | Leggy, slower growth, yellowing leaves, eventual decline without help. |
| Intervention | Minimal, mostly rotating the plant for even growth. | Essential: supplemental lighting is almost always required. |
| Temperature | Warmer, potentially hotter. | Cooler, more stable. |
To accurately gauge the light your windowsill offers, you can use a simple light meter app on your smartphone or even a dedicated light meter. Look for readings that indicate “bright indirect light” at the very least for north-facing windows, and preferably “direct sun” for others. Pay attention to how the light changes throughout the day and with the seasons. What feels bright to your eyes might still be insufficient for basil’s needs.
Embracing Supplemental Light: Your North-Facing Window’s Best Friend
This is where the magic happens for north-facing windows: supplemental lighting. Instead of throwing your hands up and thinking your basil is doomed, embrace the power of a grow light. Think of a grow light as your basil’s personal sun, guaranteeing it gets the energy it needs regardless of the weather outside or the orientation of your window.
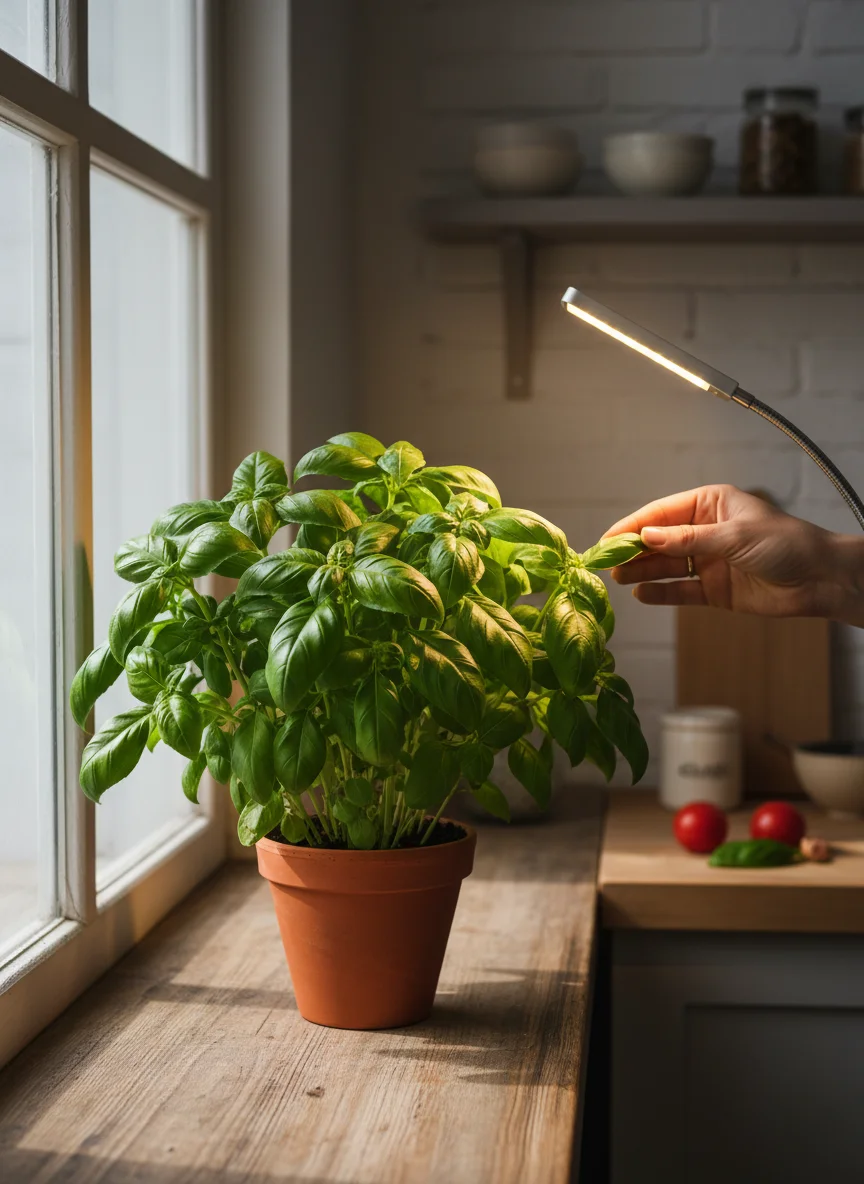
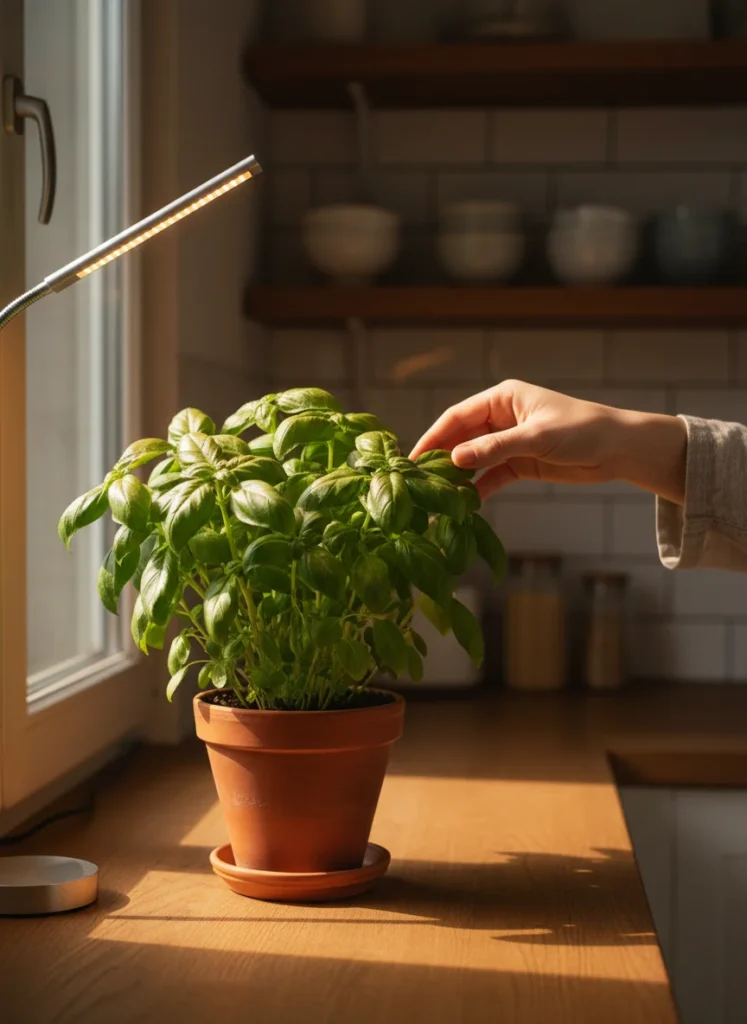
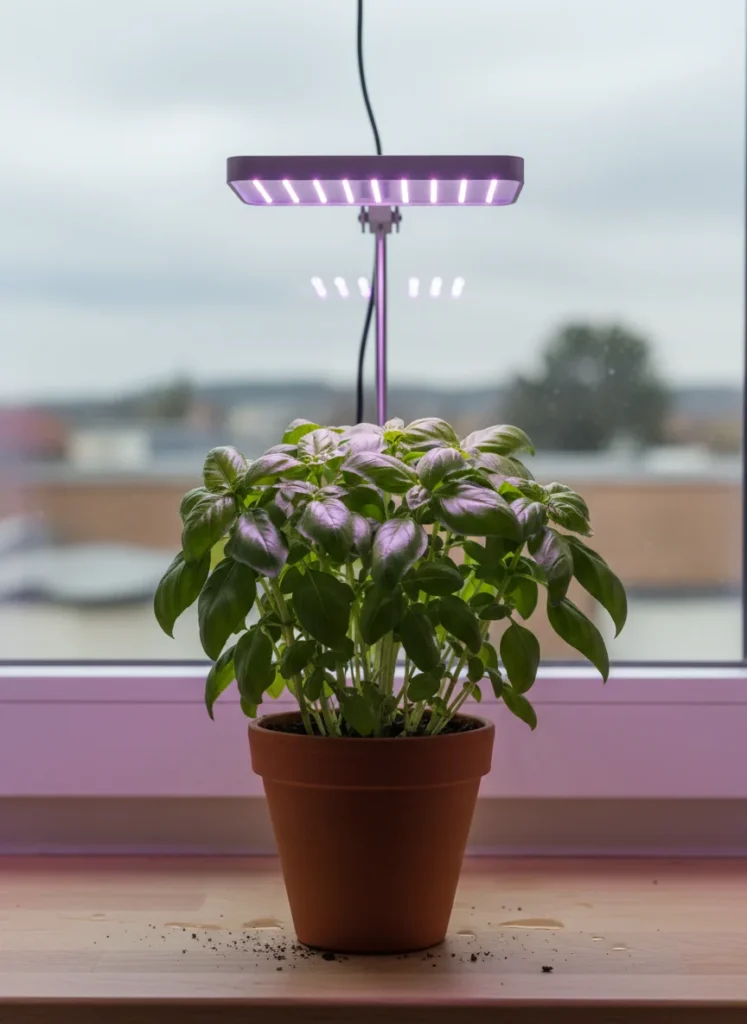
For basil, a full-spectrum LED grow light is your best friend. These lights mimic natural sunlight, providing the full range of wavelengths necessary for photosynthesis. You do not need a huge, expensive setup; compact options work perfectly for a windowsill herb garden. Look for small LED strip lights or clip-on grow lights that you can easily attach to the windowsill frame or a nearby shelf.
The key to success with a grow light lies in its proximity to the plant and the duration it stays on. Position your grow light so it hovers about 6 inches above the tallest basil leaves. This ensures the light intensity is sufficient without burning the foliage. For a north-facing window, or really any indoor setup that does not receive ample direct sunlight, aim to keep the grow light on for 12 to 16 hours a day. This extended period compensates for the lower intensity compared to natural sunlight. For instance, a grow light kept 6 inches above the plant and left on for 14 hours a day can easily provide the equivalent energy of 6 hours of strong natural sun, keeping your basil happy and productive. You can use an inexpensive timer to automate this, ensuring consistency even when you are busy.
Choosing the Perfect Home: Pot and Soil Essentials
Just like humans need a comfortable home, your basil plant needs the right pot and a nourishing soil environment to thrive. These choices lay the foundation for a healthy plant that will give you abundant harvests. Making the right selections here prevents many common issues before they even start.
The pot you choose for your basil is more important than you might initially think, and one feature is absolutely non-negotiable: a drainage hole. Basil loves consistent moisture, but it absolutely detests sitting in soggy soil. Excess water leads to root rot, a swift killer for any potted plant. Ensure your pot has at least one good-sized drainage hole at the bottom. Material wise, terra cotta pots offer excellent breathability and help prevent overwatering by allowing moisture to evaporate through their porous sides. However, they also dry out faster, requiring more frequent watering. Plastic pots retain moisture better, which can be a double-edged sword: great for moisture retention, but risky if you tend to overwater. Whichever material you choose, make sure the pot is at least 6-8 inches in diameter for a single basil plant to give its roots enough room to grow. For more insights on optimal containers, you can read about the Best Pots for Growing Herbs Indoors: What Actually Works.
Next comes the soil, which provides anchorage, nutrients, and moisture to your plant. Basil thrives in a well-drained, fertile potting mix. Do not just grab any old dirt from your garden outside; garden soil compacts in pots and introduces pests. A good quality all-purpose potting mix forms the base, but for basil, enhancing its drainage is crucial. I recommend creating a custom blend: combine two parts of a high-quality all-purpose potting mix with one part sharp sand or perlite. Sharp sand, often found in garden centers, helps create larger air pockets, while perlite, those small white volcanic rock pieces, drastically improves drainage and aeration without adding significant weight. This mixture prevents water from pooling around the roots while still retaining enough moisture and nutrients for steady growth. For a deeper dive into creating the perfect growing medium, explore our guide on Best Soil for Container Vegetables: What I Use and Why.
The Art of Watering: Keeping Your Basil Happy, Not Soggy
Watering basil properly is often where beginners make their biggest mistakes. Unlike some drought-tolerant herbs like rosemary or thyme that prefer their soil to dry out completely between waterings, basil is a more particular plant. It thrives on consistent moisture, but it will quickly protest if its roots become waterlogged. The goal is to keep the soil evenly moist, never bone dry, and certainly never soggy.
The best way to determine when to water is by feeling the soil. Stick your finger about an inch or two deep into the potting mix. If the top inch feels dry to the touch, it is time to water. If it still feels moist, hold off for another day. This simple “finger test” is far more reliable than adhering to a rigid watering schedule, as environmental factors like temperature, humidity, light levels, and pot material can all influence how quickly your soil dries out.
When you do water, do so thoroughly. Pour water slowly over the soil until you see it begin to drain out of the bottom of the pot. This ensures that all the roots receive a good drink. Discard any excess water that collects in the saucer beneath the pot after about 15-20 minutes. Leaving your basil plant sitting in standing water is a surefire way to invite root rot and other fungal diseases. Remember, a consistently moist but well-drained environment is exactly what your basil desires.
Temperature and Humidity: Creating a Cozy Indoor Environment
While light and water often take center stage, temperature and humidity also play important roles in the health and vigor of your indoor basil plant. Luckily, basil is quite adaptable to typical indoor household conditions, making it an excellent choice for a windowsill garden. Understanding its preferences helps you place it in the best possible spot and avoid common pitfalls.
Basil prefers moderate, stable temperatures, thriving best when indoor temperatures range between 50 and 80°F (10 and 27°C). This range comfortably covers most home environments. Avoid placing your basil directly next to extreme temperature sources. Cold drafts from leaky windows or frequently opened doors can stress the plant, causing leaves to yellow or growth to stunt. Similarly, placing it too close to a heat source, like a radiator or heating vent, can dry out the soil too quickly and potentially scorch the leaves.
Humidity is less of a concern for basil than it is for some other tropical houseplants, as long as its soil moisture is consistently maintained. You do not typically need to mist your basil or provide a humidity tray. In fact, consistently high humidity without good air circulation can sometimes encourage fungal issues. Many kitchens prove to be ideal locations for basil. They generally have slightly higher ambient humidity from cooking, and they offer a practical, convenient spot for you to snip fresh leaves while preparing meals. A stable temperature and consistent soil moisture contribute far more to basil’s happiness than chasing specific humidity levels.
The Secret to Endless Basil: Harvesting is Pruning
This section might just be the most important one for long-term basil success, and it is where many beginner growers go wrong. Many people hesitantly snip off a few leaves, afraid to harm the plant, only to watch it grow tall, leggy, and eventually “bolt” or flower. The truth is, harvesting basil is not just about getting leaves for your dinner; it is about strategic pruning that encourages your plant to grow bushier, stronger, and more productive. Think of it as shaping your plant for maximum yield, not just taking from it.
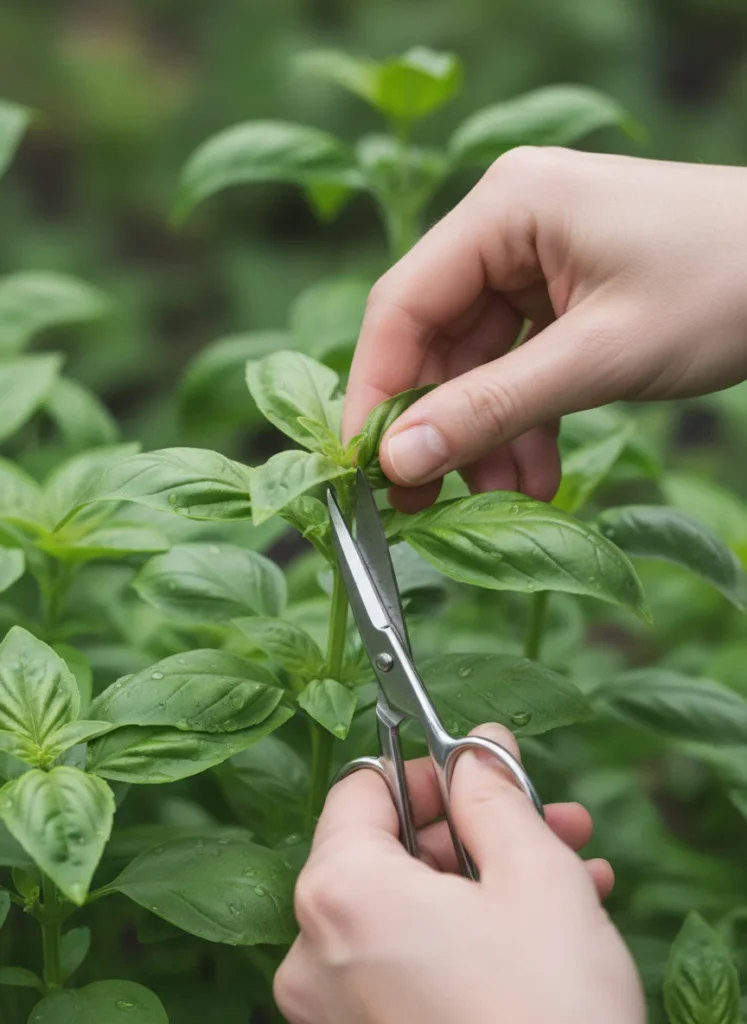
When you harvest basil, always aim to cut the central stem just above a node. A node is the point on the stem where two sets of leaves (or leaf clusters) emerge. By cutting above this point, you signal to the plant that its main growing tip has been removed. This encourages the plant to redirect its energy into developing the side shoots that are waiting at those leaf nodes. Instead of growing taller and skinnier with fewer leaves, your basil will send out two new stems from each node below your cut, resulting in a much bushier, more robust plant with far more leaves to harvest in the future.
Start harvesting your basil when it is about 6-8 inches tall and has at least two to three sets of true leaves beyond the initial seedling leaves. Do not be afraid to cut back up to one-third of the plant at a time. Always use sharp scissors or pruning shears to make a clean cut, which minimizes stress on the plant. Regular harvesting, at least once a week if your plant is growing vigorously, will keep it in a vegetative state, constantly producing new foliage.
Another critical pruning task involves pinching off any flower buds as soon as you see them forming. Basil is an annual plant, and its natural life cycle involves producing flowers, setting seed, and then dying back. When basil flowers, it redirects a significant amount of its energy from producing flavorful leaves to producing seeds. This often makes the leaves taste bitter, and the plant will slow its leaf production dramatically. By pinching off those flower buds, you essentially trick the plant into thinking it still needs to produce more leaves to complete its reproductive cycle, thus extending your harvest season significantly. Regularly inspect your plant, and simply pinch off those small, developing flower stalks with your fingers. This harvesting technique is the true secret to maintaining a thriving, leafy basil plant on your windowsill for months.
Propagation Power: Grow New Basil from Supermarket Cuttings (Bonus!)
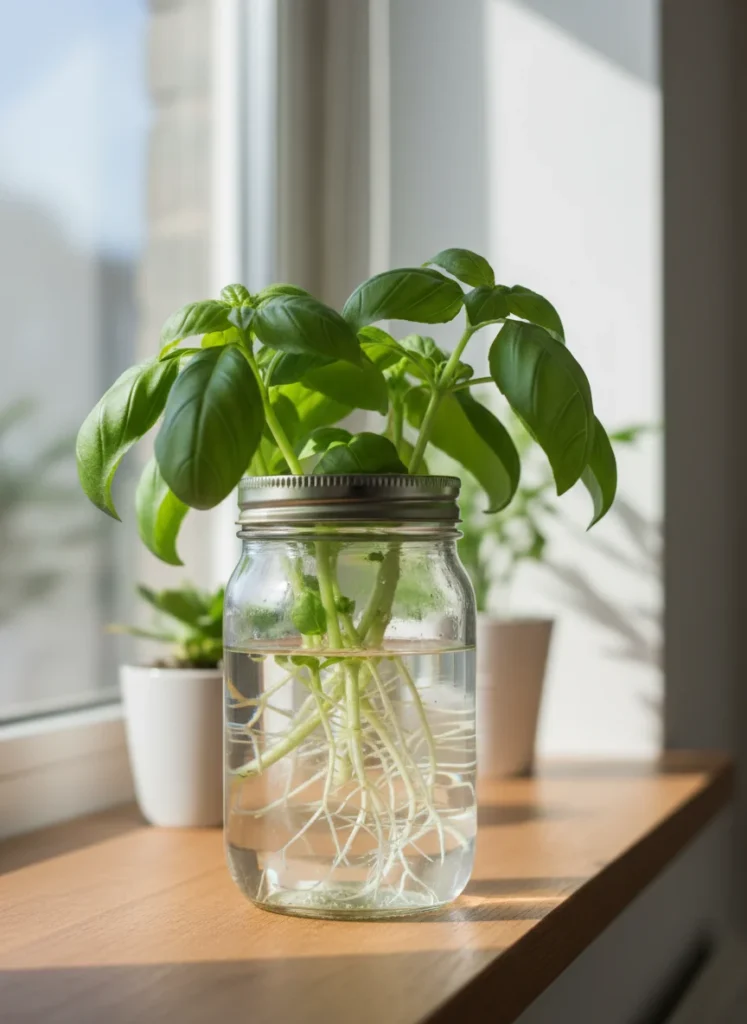
Want to expand your basil collection or simply get a head start without buying new plants or seeds? Propagating basil from cuttings is incredibly easy and highly satisfying. It is also a fantastic way to rescue those supermarket basil plants that often come packed too tightly and quickly decline. This method allows you to turn a small investment into an endless supply of fresh basil.
Start by selecting a healthy stem from an existing basil plant. Look for a section that is about 4-6 inches long, has several sets of leaves, and has not yet started to flower. Stems that have flowered tend to be less vigorous in rooting. Using clean, sharp scissors, cut the stem just below a leaf node. This node is where rooting hormones concentrate, and where new roots will primarily emerge. Remove the bottom set or two of leaves from your cutting, ensuring no leaves will be submerged in water. Leaves left in the water will rot, contaminating the water and potentially harming the cutting.
Place your basil cutting in a small glass or jar filled with clean water. Position it on your windowsill, ideally in a spot with bright, indirect light, but not intense direct sun which can heat the water too much. Change the water every day or two to keep it fresh and oxygenated, preventing bacterial growth. Within one to two weeks, you should start to see small white roots emerging from the node where you made your cut.
Once the roots are about 1-2 inches long and have developed a good network, your new basil plant is ready to be transplanted into soil. Prepare a small pot with your well-draining potting mix, as discussed earlier. Carefully plant the rooted cutting, ensuring the roots are fully covered. Water it gently after planting and place it back on your windowsill with adequate light. Treat your new plant just like a mature basil plant, and you will soon be harvesting fresh leaves from your propagated success story!
Frequently Asked Questions
Can basil grow in a north-facing window?
Yes, basil can absolutely grow in a north-facing window, but it will almost certainly require supplemental lighting. North-facing windows provide consistent but low-intensity light, which is insufficient for basil’s optimal growth. By adding a full-spectrum LED grow light for 12-16 hours a day, positioned about 6 inches above the plant, you can easily compensate for the lack of natural direct sunlight and achieve a thriving basil plant.
Why is my windowsill basil dying?
Your windowsill basil might be dying for several common reasons. The most frequent culprits include insufficient light, which leads to leggy growth and yellowing leaves; overwatering, which causes root rot and wilting; or underwatering, resulting in crispy, dry leaves. Other factors could be nutrient deficiencies, extreme temperatures (too cold or too hot), or not harvesting properly, which can cause the plant to flower and decline. Addressing light, watering, and pruning habits usually resolves most issues.
How often should I water basil indoors?
The frequency of watering basil indoors depends on various factors like temperature, humidity, pot size, and soil type. Instead of a fixed schedule, use the “finger test”: water your basil when the top inch or two of the soil feels dry to the touch. Water thoroughly until water drains from the bottom of the pot, and always discard any excess water from the saucer to prevent root rot.
What kind of pot is best for indoor basil?
For indoor basil, the best pot is one that has excellent drainage. A pot at least 6-8 inches in diameter with at least one good-sized drainage hole is essential. Terra cotta pots are a popular choice because their porous nature helps prevent overwatering, though they require more frequent watering. Plastic pots also work well, retaining moisture longer, but demand a careful hand to avoid waterlogging. The material is less important than ensuring proper drainage.
Conclusion
You now possess all the knowledge and practical strategies to confidently grow basil indoors on a windowsill, even if that windowsill faces the challenging north. We have dismantled the myth that only south-facing windows can host a flourishing herb garden. By understanding basil’s light requirements and implementing supplemental LED grow lights, you can create the perfect environment regardless of your window’s orientation.
Remember, success boils down to a few key principles: providing sufficient light (natural or artificial), choosing a well-draining pot and soil, mastering the art of consistent, but not excessive, watering, and crucially, treating harvesting as a form of pruning to encourage bushy growth. Do not let past plant failures define your gardening journey. With these steps, you can keep your basil plant producing abundant, fragrant leaves for months on end. So go ahead, choose your spot, set up your light, and get ready to enjoy the unparalleled flavor of fresh, homegrown basil, right from your very own windowsill. You absolutely can grow basil indoors on a windowsill, and I am excited for you to experience the joy of it.